Tuesday, May 22, 2012

Homemade Cinnamon Rolls

Happy Tuesday!

So I am sure you have noticed that my blog is called 'Cakes & Sweet...Oh my!' right? Well last Friday, I decided to explore the 'sweets' by making homemade cinnamon rolls from scratch.  Let me just say that I am happy that I had a lot of spare time on Friday evening.  Since I am always on the go, I decided to just relax on Friday evening as I had a busy weekend planned.  During last week, I decided that I wanted to surprise my boyfriend and make him some homemade cinnamon rolls.  I found the perfect recipe on the Carnal Dish website.  The recipe was very easy to follow and provided pictures of what the dough should look like at each step.  I am a visual person, so I loved that fact that pictures were provided.  

This was my first time making anything from scratch, especially dough.  For me the homemade dough reminded me of fondant, especially when it came to kneading it.  I was pleased with the fact that I was able to transfer some of my cake baking skills over. It makes me feel as though everything is coming together along my baking journey.  As I stated above, I am happy that I had a lot of spare time available as extra time as it is definitely needed for allowing the dough to rise properly.  There are four basic steps to making home made cinnamon rolls, as noted below:
  1. Prep your space
  2. Prepare the dough
  3. Make the filling 
  4. Prepare the icing 
Several hours later after completing the above steps, I completed my first set of homemade cinnamon rolls!  

Check out the picture below and let me know what you think!


Oh and in case you were wondering, my boyfriend LOVED the cinnamon rolls and enjoyed his surprise!  

Until my next baking adventure....

~L.B~

Tuesday, May 15, 2012

My first cupcake order - COMPLETE!

So.... I completed my FIRST cupcake order!  In my last posting I mentioned that I received my first cupcake order for birthday cupcakes.  A good friend of mine is having a birthday tomorrow, so I made her some special birthday cupcakes.  My original idea was to put bow fondant toppers on all of the cupcakes, but then my idea took a turn.  I wanted to incorporate numbers and stars into my plan as well.  So in addition to the bow toppers, I made double fondant layer stars and placed the number '30' on each of them.  I am starting to realize that whenever I have a plan for my cupcakes, the plan always seem to deviate and come together in the end.  In order to bring the bows together with the stars, I put stars in the middle of the bows.  

Check out the final results below:


I received feedback from my friend and she loves them! Of course this puts a huge smile on my face.  I was more than happy to make these cupcakes for her, especially for her birthday.

Happy Birthday Shane'a!  :-)

Until next time cake lovers & friends...

~L.B~


Wednesday, May 9, 2012

My first cupcake order

Happy Wednesday folks!

We are almost to the weekend, halfway there - woo-hoo!  

So great news everyone, I officially have my first cupcake order!  Yaaaaaaaay! A friend of mine recently asked that I make her some cupcakes for her birthday coming up next week.  I was honored by the fact that she would ask me to do such a thing for her. :-)

I brainstormed over the weekend trying to think of a cute idea for her cupcakes.  I decided to use one of the techniques that I learned in my last cake class on how to make a bow.  Instead of making a solid bow, I decided to pick two colors and alternate them.  Below is a picture of the bows that I started last night, only 8 more to go!  

Check them out, let me know what you think....


~L.B~

Thursday, May 3, 2012

Cinco de Mayo inspired cupcakes :-)

With all the festivities of Cinco de Mayo coming up this weekend, I decided to make some cupcakes for my friends.  We are all going to be hanging out and celebrating this weekend, and what better item to add to the celebration than cupcakes!  I spent most of the  week going back and forth with several ideas and looking on Pinterest for inspiration for what I wanted my cupcakes to look like.  I decided to go with two different types of cupcakes.  One with a chilli pepper on it made out of a fondant, then a flag that I can just stick in the cupcake.  I can't wait to give them to my friends this weekend, I hope they like them.  :-)

Check out my picture below of the cupcakes.


What do you think?

~L.B~

Tuesday, May 1, 2012

Ready-made fondant vs. Marshmallow fondant

Happy Tuesday!

Over the weekend I had my first trial run at making a fondant cake, you can see the picture of the cake in my post from yesterday.  After making the cake I struggled with whether or not I would actually cut into and eat it. You're probably asking me why not just eat the cake?  Well...  My fondant cake was by far my favorite cake, so I knew it would take me a second to finally cut into it.  I finally cut into the cake last night, mainly because I wanted to taste the fondant. I have been receiving several reviews about how ready-made fondant does not have a great taste. After tasting the cake last night, I will say the taste was not that bad.  After a few of the reviews I heard, I was expecting the ready-made fondant to taste like cardboard.  Though it did not have the sweetest of all tastes, I did taste a hint of sugar. If I had to give ready-made fondant a grade, I would give it a B-.  

Now that I completed the task of making an entire cake out of ready-made fondant, I wanted to try my hand at marshmallow fondant (also known as MMF).  Let me just say, the reviews were positive across the board on the taste of marshmallow fondant.  Last night after getting home from teaching my Zumba class, I made up a batch of marshmallow fondant.  Yesterday during the day I did several searches online for a marshmallow fondant recipe that would be easy for me to follow.  I found one recipe in particular that I liked and I was able to create my marshmallow fondant with ease.  It took me about 20 minutes total to create the fondant.  Since I was not using the fondant immediately, I placed it in saran wrap and then sealed it in a plastic bag.  I am working on a project for this upcoming weekend in which I will use my marshmallow fondant. I will say, while making the marshmallow fondant I did taste it and it tasted AMAZING! So my grade for the taste of marshmallow fondant is an A+!  

I will let you know how the marshmallow fondant worked for my project later on the week.  :-)

So tell me, besides marshmallow fondant what other ready-made brands do you recommend? 

~L.B~


Monday, April 30, 2012

Let's get organized - Tool Caddy

So after just taking 8 weeks of cake classes I have collected A LOT of cake tools and supplies.  After searching through my kitchen over the weekend for my spatulas, only to find out they were on the counter the WHOLE time.  I realized I needed to get organized.  I had cake supplies everywhere and they were slowly taking over my kitchen.  After completing my final cake class for Course 3, I bought myself a gift - a TOOL CADDY!

When I got home last night, I immediately put all of my supplies into the caddy and began organizing my stuff.  So let me just tell you, it's pretty much already full.  :-/ But at least I am organized!  I took a picture of my tool caddy.  Check it out!


What do you use to organize your supplies and tools?

~L.B.~

Course 3: Gum Paste & Fondant - Complete!

Happy Monday!

I hope all of you had a wonderful weekend.  Yesterday, I finished my final cake class for Course 3: Gum Paste & Fondant.  As I mentioned in one of my previous blog posts, I wanted to center my cake around the bow that I made in class last week.  My cake was a two-layered cake with purple fondant, a white bow, and pink and green flowers.  Check it out below! :-)


My classmate (http://onepreppycookie.blogspot.com/) made the following cake, also centered around the bow.
So there you have it, after four weeks of class we were able to create an entire cake made of fondant.  :-)

What do you think?  


Friday, April 27, 2012

Bake Even Strips - The Results!


Happy Friday!

I hope everyone is having a lovely morning, especially since it's Friday! I wanted to do a quick post about the baking strips. Yes, I broke down and bought them!  I just had to try them out.  :-)

So last night I baked my cake for my upcoming final cake class this weekend for Course 3: Gum Paste & Fondant.  As I stated in my previous post, I was having issues with my cakes rising too much in the middle and creating a dome shape.  I know all cakes will rise to some level, but I felt that mine were rising too high. Which in turn caused me to cut a lot of the cake off when I had to level my cake.  I read several mixed reviews about the baking strips, but I figured I will not know how they truly worked until I gave them a try.  Each day, I realize baking along with any other craft is all about trail and error.  

I made sure to follow ALL of the instructions listed on the back of the packet, as I did not want to miss any important steps.  The instructions were pretty easy to follow. I just had to soak the strips in cold water, then slowly drain the water out of them, and then place them on the pans prior to putting in the cake batter. I then evenly disbursed the batter between the two pans, and placed them into the oven for baking.

About 30 minutes later I was very impressed with my results.  The baking strips worked! My cake was not domed shaped, nor did it rise in the middle. The cake actually was pretty flat and leveled.  When I level my cake, I will not have to take off much at all.   I am definitely satisfied with my purchase of the baking strips and intend to give them a positive review.  :-)

Here are a few pictures that I took last night while baking my cake. 

Wilton Baking Strips 


Cake I made about a month ago, notice the dome shape/rising in the middle.


Cake I made last night utilizing the cake strips. :-)


Let me know what you think!  Have you tried to use the baking strips? If so, how was your experience.  

Thank you for taking the time out to read my post!  

Have a great weekend!

~L.B~

Wednesday, April 25, 2012

Bake Even Strips??

Happy Wednesday Everyone!  

Has anyone ever tried the 'bake even strips' or created their own at-home version? If so, what was your experience like?  Lately, whenever I bake my cakes I seem to get a dome shape in the middle. Then when I level the cake out it's just really short.  :-/  I wonder if I am doing something wrong...  Has this happened to you before?

Over the past few days I have been doing a few searches for online reviews on these bake even strips.  Let me just say, I am more confused than when I started my search.  The reviews were rather mixed. Some people liked the bake even strips, others not so much. I also noticed that some people were using towels and made their own strips.  

Sigh...now do you see my dilemma?  I am baking a cake for my final cake class and I want it to be perfect and rise properly.  Part of me wants to give these cake strips a try, as I am starting to see that baking is all about trail and error.  

What do you think? Have you ever used bake even strips before? ...

Tuesday, April 24, 2012

Flowers, Leaves, and a bow...

Good Morning Everyone!

So over the past three week as you know, I have been taking Course 3: Gum Paste & Fondant.  Last night I took a few pictures of the different items that I created while in class.  As you will see in one of my past blogs during the first week of class we created the bases for all of the flowers. Each we week we had the opportunity to add additional pieces to the base to created for the flower.  We were tasked with creating a carnation, a calla lily, a daisy, a mum, and a rose.  Below are my pictures of each flower at it's final stage, all which were made with gum paste.  
Gum Paste Carnation
Gum Paste Calla Lilly

 Gum Paste Daisy


Gum Paste Mum

Gum Paste Rose
Out of the pictures above, my two favorites are the mum and the daisy. Both of which are flowers that are really easy to make!

We also learned out to make leaves, which can just be placed around a cake with flowers. Or you can make a leaf cake.  Pretty much whatever your heart desires.  :-)  Below is a picture of the leaves I created in class from gum paste.  
Gum Paste Leaves
As I mentioned in my previous post, we learned out to make a bow.  In order to create a bow, you will need to use gum paste and fondant.  The bow was created with twelve 5 inch strips of 50/50 gum paste and fondant combination.  The bow takes about five days to fully dry. This will be the bow that I build my final cake around this upcoming weekend.  

50/50 Gum Paste + Fondant Bow


Today, I plan to finish up my list of items that I will need for my final cake. The excitement is building, as I cannot wait to begin to build up my masterpiece. 

Until next time... Have a great day!  :-)

~ L.B~


Monday, April 23, 2012

Just checking in...

Hey Cake Lovers!

It's been a few weeks since I have been able to sit down and blog, so much has been going on. Now that things are slowing down some, I am able to get back into the swing of things!

I owe you all several updates on my progress about Course Level 3: Gum Paste & Fondant.  Let me just say in one simple phrase 'it has been an experience'.  I have learned a lot of useful tips on how to properly use gum paste and our last week (this upcoming weekend) will focus on covering a cake with fondant.  I will say though throughout this course, I have felt a little lost. But I am slowly finding my way through the course. I have a few updated photos to post for you about the different projects we are working on for class.  This week is our final class and we get to put everything together. Yesterday in class we were tasked with making a bow, and let me say that was an experience to say the least!  A lot of time and effort goes into making a bow for cakes and/or cupcakes.  One major piece of information that I picked up was that according to our instructor it takes up to five days for the bow to dry.   So just know, if you plan on making a bow that you will need to plan ahead!  I plan to use this bow for my final masterpiece for class.  Since I am using 'cutouts' for my final cake, I cannot prepare them prior to class.  The reason is because I want the cutouts to form to the cake, so this must be done the day of.  The bow is going to be my centerpiece for my cake. I intend to use the one that I made this past Sunday in class.  So before the next class we have been tasked with the following:
  • Bake a round cake 8 X 4 double layer (We are supposed to bring to class, un-iced. But I plan to crumb layer my cake and I will finish up the icing in class.)
  • Develop an idea for the final cake 
  • Tint fondant - This was not an assigned class, but the design I have picked out requires the fondant to be tinted.
Looks like I have another busy week ahead of me. Since the bow is already done, majority of the work is out of the way.  It is just a matter of tinting the fondant, which will not be a hard task.  I will be sure to keep you posted of my progress and show you the final result.:-)

~ L.B.

Thursday, April 12, 2012

Blog Officially Updated

Greetings -

I have finally finished moving everything over from my old blog to this new one. Yay!  I promise, this will be the last switch I make concerning blogs.  Please feel free to leave me comments, subscribe to me, and follow me along this journey. 

Again, thank you for everyone who has supported me thus far and provided me with feedback. 

I look forward to continuing this journey with you.  Until next time cake lovers... :-)

~ L.B

Course 3: Gum Paste and Fondant - Week 1

About two weeks ago I started Course 3: Gum Paste and Fondant, another four week course that Wilton has to offer for the art of cake decorating.  Once you have completed Course 1 you have the option to take either Course 2:Flowers and Cake Design or Course 3: Gum Paste and Fondant.  I chose to take Course 3, and then loop back around to Course 2.

In class today we learned how to make the bases for the flowers that we will be making throughout the course.  Class kind of flew by and I can say I am not quite sure I understood the technique for some of the bases.  I plan to practice making all of the bases over again before the next class.  As they say practice makes perfect, so I definitely intend to practice making bases.

For the next class we will learn how to make the petals that will go along with all of the bases that we made today.  In additional to making petals we will also learn to make bows.

Below is a picture of the bases that were created today in class.  We had to create the following bases today in class:
  • Rose  - circle
  • Carnation - ruffled base
  • Mum - circle base
  • Calla Lilly -yellow oval
Flower Bases with Gum Paste

Let me know what you think by dropping me a comment.  :-)

Until the next time cake lovers....

Course 1 - Level 1 - Complete!

Four fun weeks later I have successfully completed the Wilton Cake Class - Level 1.  I can honestly say I was beyond shocked as to how fast the four weeks went by. I learned a lot within those four weeks too.  For our final class we were to create a cake, utilizing all of the information we learned in the three weeks prior. In the last class we also learned how to properly write on a cake, as well as make a rose. Let me just tell you making a rose was NOT easy.  Between holding the rose pin, twirling, AND creating the rose... It was definitely a difficult task. After several failed roses, part of me wanted to give up.  But another part of me also realized practice makes perfect.  Below is a picture of the final cake that I prepared. The roses did not quite come out as I expected them to, but it was a great start. :-)


I definitely need to work on several techniques and master them, but I am happy with my results of the course. The next class that I signed up for is Course 3: Fondant and Gum Paste.  With the Wilton Cake Courses after you have completed Level 1 you can either take Course 2: Flowers or Course 3: Fondant and Gum Paste.  Course 3 worked better for my schedule and I am also very fascinated by Fondant, so Course 3 was definitely my option of choice.  I start Course #3 this upcoming weekend, and I cannot wait! 
Until next time Cake Lovers and friends....XoXo L.B.

Prepping for my final Level 1 Class...

So this week is my final week of Course 1.  Let me just tell you the time FLEW by!  For this week, we have been tasked with putting all of the skills that we learned over the past 3 weeks together. We will then put these skills to work by decorating an entire cake.  In our Lesson Plan book there were several cakes to pick from. I picked one that had a base of flowers, topped with roses on the top.  Since I have to provide a border of flowers on the bottom of my cake, I had to make those well in advance. I have to make the flowers well in advance so that they may dry before I place them onto my cake.  I decided to go with the colors of pink, purple and yellow.  Over the weekend I made my flowers in each of the colors that I listed out above.  In addition to preparing the flowers in advance, I also must:
  • Bake a cake
  • Frost the cake
  • Prepare frosting (both thin and thick consistency)
  • Practice making roses (I will need several roses in each color for my cake for class) 
Now do you see why I went ahead and made the flowers?.... I have a lot of prep to do before putting everything together.  Don't worry, you know I will keep you posted on my progress.
But for now, below is a picture of the flowers that I prepared over the weekend. :-)


 Until next time cake lovers.... ~ L.B

Week 3 - Decorating Cupcakes


After I mastered preparing icing at the proper consistency (medium).  I was able to practice decorating cupcakes.  Check out a few of the results below.  Let me know what you think!  :-)


Level 1 - Week 3 - Flowers

In week 3 we were tasked with making flowers out of the icing that we prepared prior to class. My icing was way too thin, as you will see my consistency post prior.  I realized it is definitely about consistency.  Below is the flower that I was able to make on a rose pin.


What do you think?  I will say that I am a bit shocked I was able to layer the icing, due to it being so thin.

It's all about consistency!

When I say ‘it’s all about consistency’ - I mean it to the fullest!  So for week 3, we were tasked with preparing icing for decorating cupcakes.  We were told that we needed to make frosting with a medium consistency.  I made several colors for my flowers and cupcakes.  It took me a few days because due to my hectic schedule. It is really hard for me to sit down and do it all in one night.  As you will see by the picture below I made A LOT of icing! LOL


So after making of that icing, I get to class to find out that my icing is TOO thin.  Therefore I wasn’t able to decorate my cupcakes.  I was definitely not happy about hearing that my frosting is pretty much going to go to waste.  But eh…you live and you learn right?… So the moral of this story is about consistency. If your frosting is too thin you will not be able to decorate your cupcakes or cake.  Sigh……  Ah well, at least I gave it my best shot!  I will say once I got home, I did throw out the frosting since it was all too thin.   :-(

Saturday morning I woke up more determined than ever to figure out what I did wrong as far as creating the proper consistency.  After about two hours of working on icing and decorating, I was pleased with my results.  I also realized where I went wrong, I had way too much milk in my frosting. Which in turned thinned out the frosting.  You better believe I will not make that mistake again.  :-)

I will post a few pictures of my cupcakes from Saturday morning in my next post.

Stay tuned cake lovers…. :-)

Level 1 - Week 2 - Cake Decorating

Below are the pictures I took from Week 2 of cake class. We were tasked with baking a cake prior to class, preparing icing, and selecting a stencil to design on the cake. I tried out the method of keeping the cake moist, as you will see with the first photo with the saran wrap. Let me tell you it was so good! As you can see by the huge slice of cake that was cut in the last photo. LOL. Needless to say....The cake barely lasted through the weekend. So yummy!  :)


Level 1 - Week 1 - The Basics

So a few days have passed and I completed my first class on Friday. Let me just say it was so much fun!  I had an absolute blast, the class time flew by.  As they say time flies when you are having fun! The entire level-1 course is 4-weeks, with classes that are two hours long.  Those that know me, know I'm a time-oriented person so I arrived at class a little early to secure a good spot.  When I arrived at the classroom I was the only person there, though I noticed there were some bags and supplies on the table next to me.  I waited in anticipation not really knowing what to expect. Moments later the instructor arrived, followed by more students. The class was six people total. I think six is a good class size, because it allows for one-on-one time with the instructor when needed.

As class started the instructor explained that she would be doing a lot of talking and explaining, but the upcoming weeks would be more activities.  When the instructor stated this I immediately got a flash back to my college days, and the first day of class.  Most of the first classes were introductions with the instructor explaining what was to be expected from the course.  Even though we did not do a lot of hands-on activities in class I learned A LOT of useful information.  I took about a page and a half of notes. I'm a note taker, so I am known to take notes.  :-)

Being that I really do not have a lot of baking experience, I soaked up all of the information that I possibly could. A few things that I learned that I thought were kind of cool, were the following:
  • Baking a cake:  When baking a cake place the ingredients out for about 10-20 minutes prior to baking.  This allows for the ingredients to chill and become room temperature.  
  • Add moisture to a cake:  Wrap the cake in saran wrap and place into the fridge for about 20 minutes. When you take the cake out, the cake will be moist.  Vanilla cake has a tendency to be drier. 
  • Frosting: Frosting can last up to 2 months in the fridge in a sealed container, and up to a year if placed in the freezer.
  • Frosting Consistency: There are three types of consistencies for frosting: thin, medium, stiff.  The thin consistency is used for writing/printing and icing the cake.  The medium consistency is used to create designs such as stars, borders, and flowers with petals that lie flat.  The stiff consistency is used for decorations such as flowers with upright petals (like a rose).
  • Avoid crumbs:  Once the cake has had a chance to cool off, level off the top of the cake with a leveler, then flip the cake over.  The bottom will now become the top of the cake and will provide a smooth surface for icing.
The above tips are going to be particularly useful to me when I bake my cake for the next class.  I can't wait to test them all out!

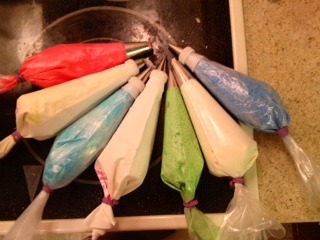
In addition to learning about some key tips to baking, we also learned how to place icing into an icing bag, the differences between the tips, and how to make stars.  I took so many notes on the different tips, don't you worry. I will be sure to blog about the different tips that were included in my cake kit.  After we were shown the proper method to create stars, we were able to then practice on cookies.

Please see below for the pictures of the star decorating exercise using the cake decorating tip #18:
Included within the cake decorating kit, there were various practice stencils.  The one below depicts the one we used to make stars.  As you will see by the first star (well not sure if you want to call it a star lol), I didn't know what I was doing.  I got better as the practice lesson went on.

 After completing the practice set above, I got to work on the cookies.  I made real simple designs and played it on the safe side.  Don't worry, I will practice more and take more risks.  Below you will see the three cookies that I decorated while in class.


I know, I know these are really basic, but hey it's a start!  For the next class we have been tasked with the following:
  1. Bake a cake - 8 inch
  2. Prepare frosting medium consistency, thin consistency
  3. Pick out colors for decorating
Phew! As you can see from above, I learned a lot of information in just two hours. I just can't wait until the next class.  In the next class we get to ice a cake, use piping gel to stencil on a design, then finally decorate the cake with the stencil.  For my next blog, I will let you know how my experience preparing frosting went.  Until the next one cake lovers..... ~  xoxo L.B

Icing Bag Tip - Video

(Post originally posted on 2/27/2012)

So last night as I was browsing through Pinterest I came across the following tip when it comes to using the reusable cake icing bags. The clip provided clear and easy steps for inserting the icing into the reusable cake bag.  I definitely plan to use this technique after I have completed my cake courses.  Take a look at the video and let me know what you think.


What are your thoughts??

Wilton Cake Course - Level 1 - I'm registered!!!

(Post originally posted on 2/26/2012)

Hey Cake Lovers!!!
Whew! It's been a few months since I have had a chance to blog about my cake journey.  So far it's been well a bit slow, 2012 took off with a bang and so did my schedule.  I've been tracking cake classes to see what would work with my schedule, since my weeks are so busy with my full-time job and teaching Zumba three nights out of the week it's been a bit difficult finding a class.  I'm sure you're probably wondering now when will you fit in decorating cakes?!?  Oh no worries... I will make the time!  So now we are about to enter the third month of the year and I have FINALLY found a class that will work with my hectic schedule.  Woo-hoo!

For those who are curious, you can register for cake classes at your local craft stores such as Micheal's Arts & Craft, JoAnn Fabrics, and A.C. Moore.  I will be taking my classes at JoAnn Fabrics starting this week, and I am so excited!  I happen to secure the last spot in the class, I had no clue the class would be such a popular class and fill up so fast. Go figure?!?  As soon as I registered for the class I received my supply list.  Now let me tell you...  I had flash backs of when I was in middle school shopping for supplies and I was so excited.  I immediately grabbed a basket and made a mad dash to the cake decorating section of the store.  As I was placing the items in my basket, my excitement continued to build. I have officially taken my first step towards fulfilling one of my passions.  I cannot wait for my first class!!!  (Can't you tell?)

Once I got settled in at home I dumped everything out of my bag so I could begin to familiarize myself with the various supplies. Since I am documenting my cake journey you can see the pictures below for each of the items that I purchased today.  

The basic tools needed for the Wilton Cake Decorating Basics - Level 1 are the following:

  • Decorating Basics Kit:  Includes the essential tools to get you started.  Some of the items within this kit include decorating tips, standard couplers, reusable featherweight bags, disposable decorating bags, decorating brush, cupcake nail, spatula, and many other useful tools. 
  • Decorating Basics Lesson Plan: The Lesson Plan book provides step by step processes that will be covered in the class.
  • Ready-to-use Decorating Icing
  • Meringue Powder:  Used to stabilize butter cream icing
I will go ahead and admit, I have peaked inside of the lesson plan to see what is in store for me.  I must say after reading the first few pages of the lesson plan book, I immediately got excited all over again!  I just  can't wait!!!!!  

Now that I have registered for the class there are few other essential items that I need to be pick up prior to my first class, such as a notebook, pen, sticky notes, etc. I plan to pick up these items throughout the week before class.  So it's official cake lovers I am on my way!  I will post more later on this week after my first class. Stay tuned!!!  

Until next time cake lovers... ~ xoxo L.B

Tuesday, April 10, 2012

Under construction...

Greetings! 

I am working on updating my page, I currently have a blog under Tumblr (but I am moving everything back over to blogspot).  I have absolutely nothing against the Tumblr blogging option, but I have noticed that there are a few features that I prefer to use that are not available through their website.  So please bare with me as I move everything back over.  Just give me a couple of days and everything will be up and running soon. 

Thank you for your patience.  :-)

L.B.