Friday, April 27, 2012

Bake Even Strips - The Results!


Happy Friday!

I hope everyone is having a lovely morning, especially since it's Friday! I wanted to do a quick post about the baking strips. Yes, I broke down and bought them!  I just had to try them out.  :-)

So last night I baked my cake for my upcoming final cake class this weekend for Course 3: Gum Paste & Fondant.  As I stated in my previous post, I was having issues with my cakes rising too much in the middle and creating a dome shape.  I know all cakes will rise to some level, but I felt that mine were rising too high. Which in turn caused me to cut a lot of the cake off when I had to level my cake.  I read several mixed reviews about the baking strips, but I figured I will not know how they truly worked until I gave them a try.  Each day, I realize baking along with any other craft is all about trail and error.  

I made sure to follow ALL of the instructions listed on the back of the packet, as I did not want to miss any important steps.  The instructions were pretty easy to follow. I just had to soak the strips in cold water, then slowly drain the water out of them, and then place them on the pans prior to putting in the cake batter. I then evenly disbursed the batter between the two pans, and placed them into the oven for baking.

About 30 minutes later I was very impressed with my results.  The baking strips worked! My cake was not domed shaped, nor did it rise in the middle. The cake actually was pretty flat and leveled.  When I level my cake, I will not have to take off much at all.   I am definitely satisfied with my purchase of the baking strips and intend to give them a positive review.  :-)

Here are a few pictures that I took last night while baking my cake. 

Wilton Baking Strips 


Cake I made about a month ago, notice the dome shape/rising in the middle.


Cake I made last night utilizing the cake strips. :-)


Let me know what you think!  Have you tried to use the baking strips? If so, how was your experience.  

Thank you for taking the time out to read my post!  

Have a great weekend!

~L.B~

Wednesday, April 25, 2012

Bake Even Strips??

Happy Wednesday Everyone!  

Has anyone ever tried the 'bake even strips' or created their own at-home version? If so, what was your experience like?  Lately, whenever I bake my cakes I seem to get a dome shape in the middle. Then when I level the cake out it's just really short.  :-/  I wonder if I am doing something wrong...  Has this happened to you before?

Over the past few days I have been doing a few searches for online reviews on these bake even strips.  Let me just say, I am more confused than when I started my search.  The reviews were rather mixed. Some people liked the bake even strips, others not so much. I also noticed that some people were using towels and made their own strips.  

Sigh...now do you see my dilemma?  I am baking a cake for my final cake class and I want it to be perfect and rise properly.  Part of me wants to give these cake strips a try, as I am starting to see that baking is all about trail and error.  

What do you think? Have you ever used bake even strips before? ...

Tuesday, April 24, 2012

Flowers, Leaves, and a bow...

Good Morning Everyone!

So over the past three week as you know, I have been taking Course 3: Gum Paste & Fondant.  Last night I took a few pictures of the different items that I created while in class.  As you will see in one of my past blogs during the first week of class we created the bases for all of the flowers. Each we week we had the opportunity to add additional pieces to the base to created for the flower.  We were tasked with creating a carnation, a calla lily, a daisy, a mum, and a rose.  Below are my pictures of each flower at it's final stage, all which were made with gum paste.  
Gum Paste Carnation
Gum Paste Calla Lilly

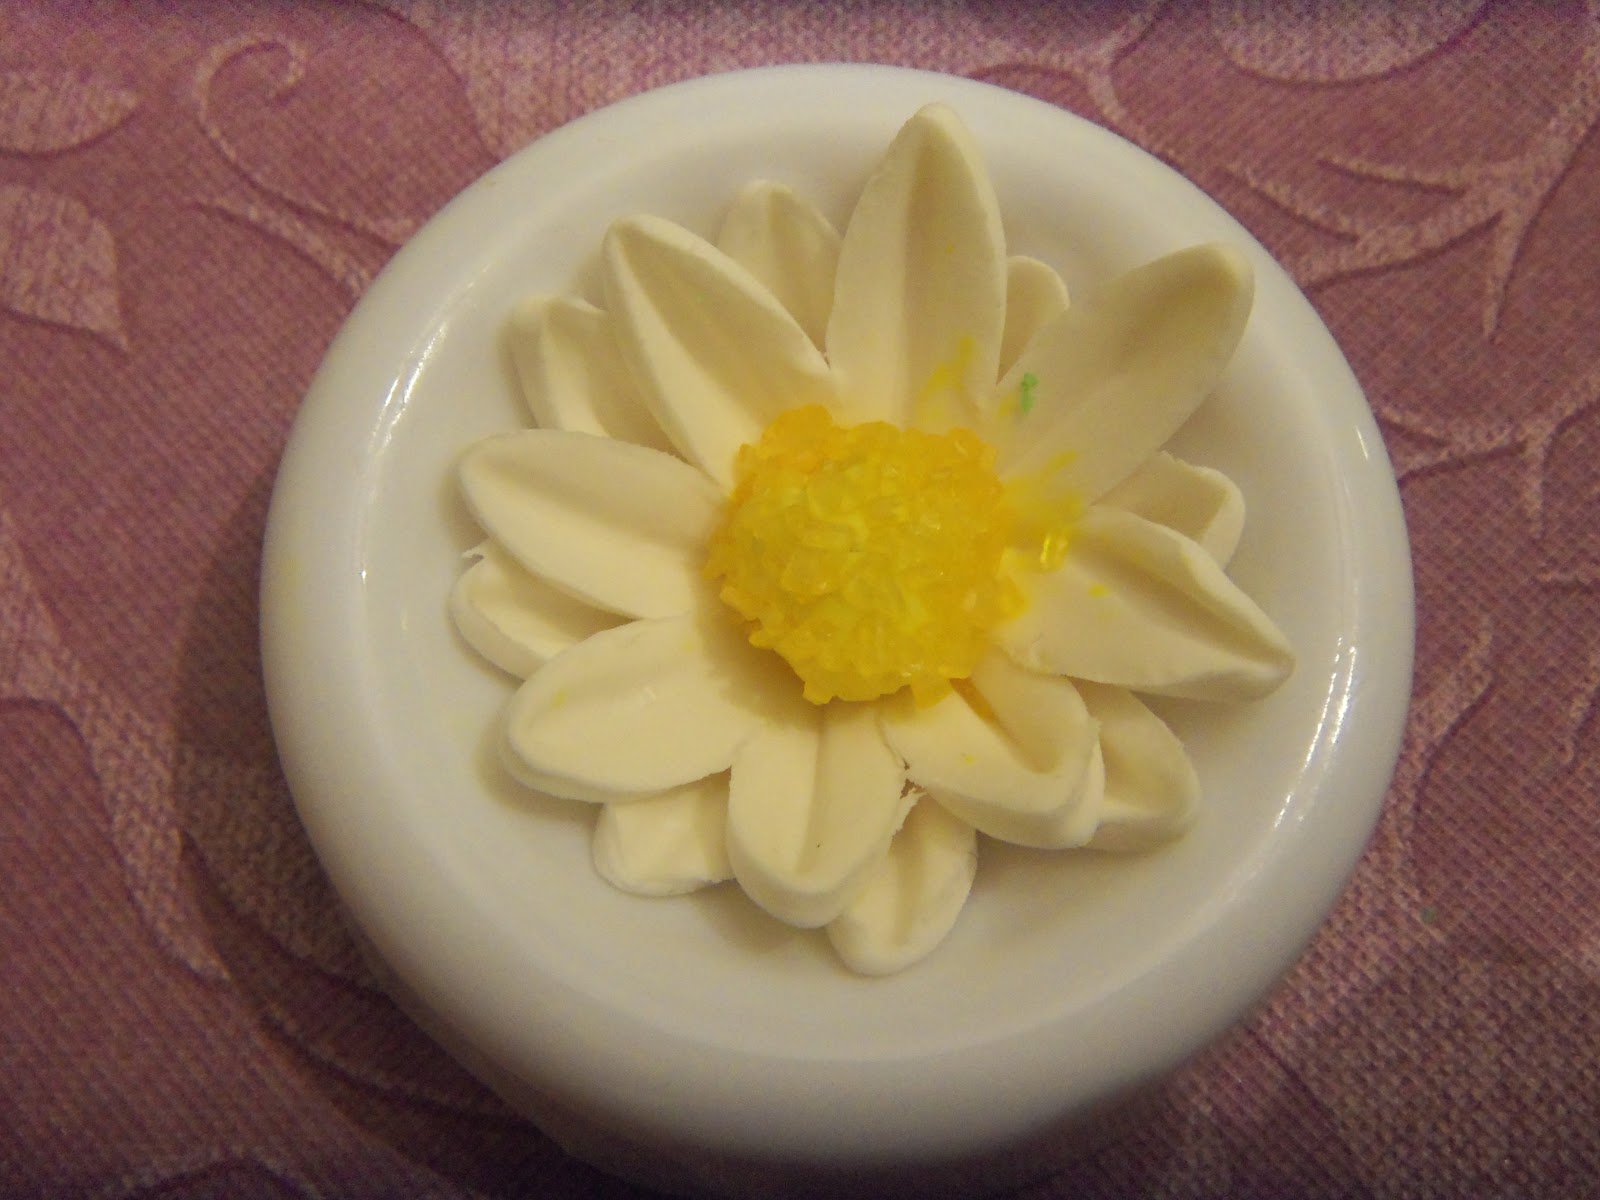
 Gum Paste Daisy


Gum Paste Mum

Gum Paste Rose
Out of the pictures above, my two favorites are the mum and the daisy. Both of which are flowers that are really easy to make!

We also learned out to make leaves, which can just be placed around a cake with flowers. Or you can make a leaf cake.  Pretty much whatever your heart desires.  :-)  Below is a picture of the leaves I created in class from gum paste.  
Gum Paste Leaves
As I mentioned in my previous post, we learned out to make a bow.  In order to create a bow, you will need to use gum paste and fondant.  The bow was created with twelve 5 inch strips of 50/50 gum paste and fondant combination.  The bow takes about five days to fully dry. This will be the bow that I build my final cake around this upcoming weekend.  

50/50 Gum Paste + Fondant Bow


Today, I plan to finish up my list of items that I will need for my final cake. The excitement is building, as I cannot wait to begin to build up my masterpiece. 

Until next time... Have a great day!  :-)

~ L.B~


Monday, April 23, 2012

Just checking in...

Hey Cake Lovers!

It's been a few weeks since I have been able to sit down and blog, so much has been going on. Now that things are slowing down some, I am able to get back into the swing of things!

I owe you all several updates on my progress about Course Level 3: Gum Paste & Fondant.  Let me just say in one simple phrase 'it has been an experience'.  I have learned a lot of useful tips on how to properly use gum paste and our last week (this upcoming weekend) will focus on covering a cake with fondant.  I will say though throughout this course, I have felt a little lost. But I am slowly finding my way through the course. I have a few updated photos to post for you about the different projects we are working on for class.  This week is our final class and we get to put everything together. Yesterday in class we were tasked with making a bow, and let me say that was an experience to say the least!  A lot of time and effort goes into making a bow for cakes and/or cupcakes.  One major piece of information that I picked up was that according to our instructor it takes up to five days for the bow to dry.   So just know, if you plan on making a bow that you will need to plan ahead!  I plan to use this bow for my final masterpiece for class.  Since I am using 'cutouts' for my final cake, I cannot prepare them prior to class.  The reason is because I want the cutouts to form to the cake, so this must be done the day of.  The bow is going to be my centerpiece for my cake. I intend to use the one that I made this past Sunday in class.  So before the next class we have been tasked with the following:
  • Bake a round cake 8 X 4 double layer (We are supposed to bring to class, un-iced. But I plan to crumb layer my cake and I will finish up the icing in class.)
  • Develop an idea for the final cake 
  • Tint fondant - This was not an assigned class, but the design I have picked out requires the fondant to be tinted.
Looks like I have another busy week ahead of me. Since the bow is already done, majority of the work is out of the way.  It is just a matter of tinting the fondant, which will not be a hard task.  I will be sure to keep you posted of my progress and show you the final result.:-)

~ L.B.

Thursday, April 12, 2012

Blog Officially Updated

Greetings -

I have finally finished moving everything over from my old blog to this new one. Yay!  I promise, this will be the last switch I make concerning blogs.  Please feel free to leave me comments, subscribe to me, and follow me along this journey. 

Again, thank you for everyone who has supported me thus far and provided me with feedback. 

I look forward to continuing this journey with you.  Until next time cake lovers... :-)

~ L.B

Course 3: Gum Paste and Fondant - Week 1

About two weeks ago I started Course 3: Gum Paste and Fondant, another four week course that Wilton has to offer for the art of cake decorating.  Once you have completed Course 1 you have the option to take either Course 2:Flowers and Cake Design or Course 3: Gum Paste and Fondant.  I chose to take Course 3, and then loop back around to Course 2.

In class today we learned how to make the bases for the flowers that we will be making throughout the course.  Class kind of flew by and I can say I am not quite sure I understood the technique for some of the bases.  I plan to practice making all of the bases over again before the next class.  As they say practice makes perfect, so I definitely intend to practice making bases.

For the next class we will learn how to make the petals that will go along with all of the bases that we made today.  In additional to making petals we will also learn to make bows.

Below is a picture of the bases that were created today in class.  We had to create the following bases today in class:
  • Rose  - circle
  • Carnation - ruffled base
  • Mum - circle base
  • Calla Lilly -yellow oval
Flower Bases with Gum Paste

Let me know what you think by dropping me a comment.  :-)

Until the next time cake lovers....

Course 1 - Level 1 - Complete!

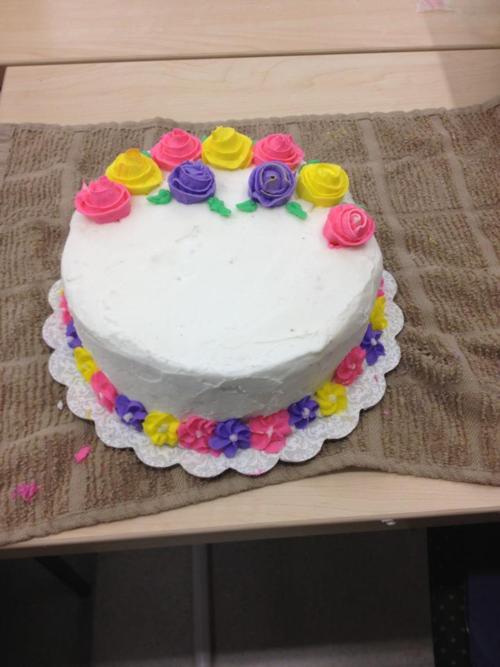
Four fun weeks later I have successfully completed the Wilton Cake Class - Level 1.  I can honestly say I was beyond shocked as to how fast the four weeks went by. I learned a lot within those four weeks too.  For our final class we were to create a cake, utilizing all of the information we learned in the three weeks prior. In the last class we also learned how to properly write on a cake, as well as make a rose. Let me just tell you making a rose was NOT easy.  Between holding the rose pin, twirling, AND creating the rose... It was definitely a difficult task. After several failed roses, part of me wanted to give up.  But another part of me also realized practice makes perfect.  Below is a picture of the final cake that I prepared. The roses did not quite come out as I expected them to, but it was a great start. :-)


I definitely need to work on several techniques and master them, but I am happy with my results of the course. The next class that I signed up for is Course 3: Fondant and Gum Paste.  With the Wilton Cake Courses after you have completed Level 1 you can either take Course 2: Flowers or Course 3: Fondant and Gum Paste.  Course 3 worked better for my schedule and I am also very fascinated by Fondant, so Course 3 was definitely my option of choice.  I start Course #3 this upcoming weekend, and I cannot wait! 
Until next time Cake Lovers and friends....XoXo L.B.